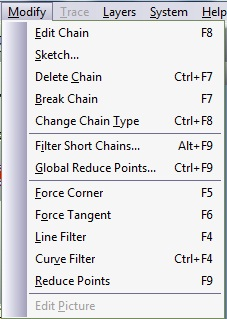
| Modify Menu | ||
|---|---|---|
 |
Chapter 2. Trace |  |
| Modify Menu | ||
|---|---|---|
| |
Chapter 2. Trace | |
 |
Select a portion of the image to edit. Selecting a chain is the equivalent to marking elements in the GraphiCAD, Picture to Part, and Mill modules. enables you to edit only portions of the image. is activated by selecting this option from the command bar or clicking F8 shortcut key and clicking the desired chain, or by pressing Ctrl while clicking on the desired chain. The selected element appears with nodes (circles/rectangles marking the control points). You can apply some actions on the selected element:
|
 |
Draw freehand. This feature is useful for tracing a picture background manually. When you select , a dialog box with the Sketch options appears:
While sketching, you may switch back and forth between the Tangent and Corner options. Press Esc to quit the sketching mode and return to the editing mode. |
 |
Erases portions of the drawing that are not required. Activate the feature from the menu.
Upon selecting this option, the cursor will change to a delete cursor
|
 |
Delete part of the chain and break it. The chain will break only between two neighboring control points. Activate the feature from the menu or by using the F7 keyboard shortcut. Position the cursor on the part to be deleted and click the mouse button. This command is repetitive and is terminated by pressing Esc or making a new selection from the menu. To select a new chain, simply press Ctrl while clicking with the mouse on a new chain.
Upon selecting this option, the cursor will change to a break cursor
|
 |
Enables you to change the nature of any geometry from one based on curves and/or polylines to one based on either curves or polylines. is activated by selecting this option from the menu. This command is repetitive and is terminated by pressing Esc or by making a new selection from the menu. To select a new chain, simply press Ctrl while clicking with the mouse on a new chain.
Upon selecting this option, the cursor will change to a change chain type cursor
|
 |
Reduces the number of control points along all the curves in your job. This option is very useful when tracing a "noisy" image with groups of control points which do not contribute to the shape of the original image. You can reduce the number of control points that describe the image.
Enter the Tolerance value, which defines the approximation of the new curves regarding the original curves. Press to confirm or to abort this option. The new curves will have fewer points only if the tolerance is loose enough; this requires some "feel". |
 |
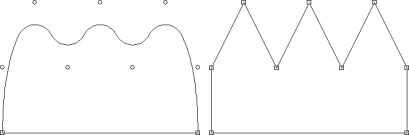
To change any arc on the selected geometry into a vertex of two line segments. With this function, you can change a figure with rounded corners into a figure with angular corners.
To apply this function, select the object. Choose from the menu. Place the cursor on the point that is to be the vertex and click with the mouse. Pressing F5 or pressing on the toolbar can also activate . To select a new chain, simply press Ctrl while clicking with the mouse on a new chain. is repetitive and is terminated by pressing Esc.
Upon selecting this option, the cursor will change to a force corner cursor
|
 |
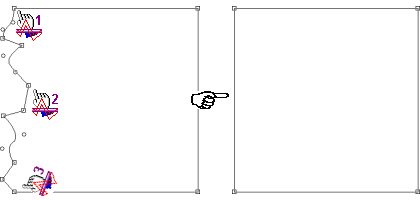
Filter a group of extraneous points along a desired polyline in order to achieve a straight line. The new line can then be edited like any line segment.
To use this function, select the object. Choose from the menu. Three points must be selected to apply the filter: the starting point, the direction point (a point between the starting point and the end point), and the end point. After the third point is selected, a single line segment appears. This line segment connects the starting point and the end point. To select a new chain, simply press Ctrl while clicking with the mouse on a new chain. |
 |
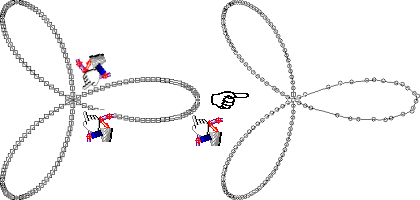
Reduce the number of control points along a curve. This option is very useful when tracing a "noisy" image with groups of control points, which do not contribute to the shape of the original image.
To use this function, select the object. Choose from the menu. Three points must be selected to apply the filter: the starting point, the direction point (a point between the starting point and the end point), and the end point. After the third point is selected, the Tolerance dialog box appears: Enter the Tolerance value, which defines the approximation of the new curve regarding the edited curve. Press to confirm or to abort this option. The section of chain that has been selected will be replaced with a new curve. The new curve will have fewer points only if the tolerance is loose enough; this requires some "feel". To select a new chain, press Ctrl while clicking with the mouse on a new chain. |
 |
Used on a raster image, before tracing it into a vector image. By adding graphical filters to the raster image you are able to trace the image with greater ease and precision. Select from the menu; the Raster Filters dialog box will open. You can now edit the picture using the graphical filter option and the scale variants. To use this function, select the object. Choose from the menu. Three points must be selected to apply the filter: the starting point, the direction point (a point between the starting point and the end point), and the end point. After the third point is selected, a single curve appears. This curve connects the starting point and the end point. To select a new chain, simply press Ctrl while clicking with the mouse on a new chain. |